Wednesday, December 23, 2020

Making a Jewelry Box with the Inventables X-Carve CNC Machine

Previously I made a Jewelry Box for my daughter using the bandsaw.  It was a fancy bandsaw box.  I thought it would be fun to challenge myself to make one with my Inventables X-Carve CNC Machine.  I designed a more modern box with shallow drawers and more compartments for separating the jewelry.  I think it turned out pretty awesome!  Check out my video of this project below.

I designed this project using the Inventables free EASEL online software.  The project workspace has 4 tabs at the bottom.  Tabs 1-3 are used to actually cut the parts from 3/4" maple and cherry boards.  The 4th tab contains my original design drawings so anyone can customize the design to fit their needs.  Click here to open my EASEL project to see how it's designed and make one yourself.

EASEL Design

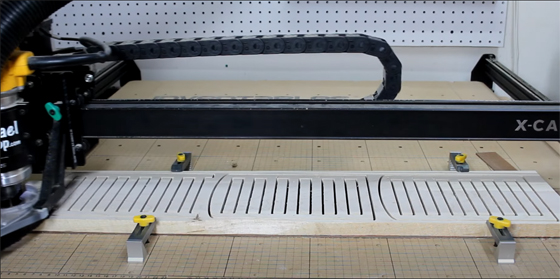
It took about 4 hours of machine time to cut all of the parts using the default settings, which are very conservative.  That's ok, because I got a lot of other stuff done while the machine was hard at work.

X-Carve CNC Machine

I purchased some 1/4" aluminum rod from the home center and cut six pieces that are 3/4" long for the drawer pulls.  I used the drill to spin them while I smoothed them out with sandpaper and gave them a brushed look.  These look great and were super cheap.

Aluminum Drawer Pulls

The design contained alignment holes and I used some pieces of bamboo skewers as pins to keep the boards from sliding around during glue up.

Gluing Up the Box

I applied my favorite finish which is Deft Clear Wood Finish Satin Spray Lacquer and the box came out great.  Thanks for checking out my project!

CNC Jewelry Box


Clicking a referral/affiliate link in this article and making a purchase will help to support my channel via a small referral fee from the merchant.  Thank you for your support!

Saturday, November 28, 2020

Making Miniature Road Signs with a Scroll Saw

There are a lot of cool road signs out there and some are fantastic pieces of artwork!  I decided to pick my favorite signs that remind me of road trips with my family or landmarks in my hometown.  Watch my video below to see which road signs I picked and how I made miniature versions of them my scroll saw.

When I was young, my family would pack up the Ford station wagon and head to the beach in Florida.  On the way, we would pass time by playing a Road Sign Alphabet Game.  Start by finding a sign that contains letter A and call it out.  Then look for a sign with letter B.  Keep hunting signs for each letter, then whoever gets to the end and finds a sign with Z on it first wins.  I always wondered if anyone else playing this road trip game.

Holiday Inn Sign

These signs are made using a technique called "Segmentation".  Basically, you place a cutting template on a piece of wood, then cut the parts of the sign with the scroll saw.  Separate the parts to sand and paint them, then glue them back together to make the finished sign.

The Varsity Sign

If you would like to make some signs yourself, click here to download templates for the signs I selected.  For other signs, a simple Google Images search should find a logo or picture that you can use as a template.

Big Chicken

These signs would make great personalized gifts for people.  If you know someone who has a favorite vacation spot, restaurant, hometown landmark, or maybe is passionate about a company that they worked for, then make them a sign.  These could also be used for model railroad displays if you can cut them to scale.  Have fun!

Miniature Road Signs

Sunday, September 27, 2020

Make a Keychain Display Rack

Whenever I travel to some place new, I get a keychain for my keychain collection.   I have about 50 keychains in a plastic bag that I would like to display in my office, so I decided to make a Keychain Display Rack.  Check out my video of this project below.

I designed this project using the Inventables free EASEL online software to design the project.  I added the title of the Dr. Seuss book "Oh, the Places You'll Go" at the top and a grid of 54 holes.  The text at the top can be customized or removed to fit more keychains.  I used a precut piece of Baltic Birch Plywood that is 24" wide x 30" tall x .5" thick for this project.  Click here to open my EASEL project to see how it's designed.

The Carmichael Workshop Keychain Display Design

I used my X-Carve CNC Woodworking Machine from Inventables to carve the letters and drill all of the holes.

The Carmichael Workshop X-Carve CNC

I purchased enough Axel Pegs from Hobby Lobby to fill up the board and glued them into the holes.  I used a small square to make sure they were straight.  These pegs can hold several keychains as I expect my collection to grow.

The Carmichael Workshop Keychain Display Rack

I trimmed the edges of the board with some 1/2" angle aluminum which looks really cool.  These are mitered in the corners and screwed into the sides of the plywood.  Did you know that you can cut aluminum with regular woodworking saws?  I used my bandsaw.

The Carmichael Workshop Keychain Display

Below is the final project with all of my keychains hanging on it.  Each keychain brings back special memories whenever I look through them.  I love having this in my office.  Thanks for checking out my project!
The Carmichael Workshop Keychain Display

Clicking a referral/affiliate link in this article and making a purchase will help to support my channel via a small referral fee from the merchant.  Thank you for your support!

Saturday, July 11, 2020

Make a Table Top Donut Wall

I was asked to make a Donut Wall for a special birthday party.  I Googled it and learned that a Donut Wall is a fun, creative way to serve donuts at any party or event.  It's easy to make with standard lumber from the home center and basic woodworking tools.  Check out the video below.


If you would like to make one, click here to download my free Donut Wall plans.   Here are basic instructions.
  1. Cut all of the boards to size according to the plans.
  2. Drill evenly spaced 3/8" holes about 1/2" deep for the pegs.
  3. Start from the bottom and attach the thin slat, followed by the 6 wide slats.  Leave a 1" gap between each slat except for the top 2 slats.
  4. Glue in the pegs so they are straight and perpendicular to the boards.
  5. Attach the two legs.
  6. Apply finish or paint as desired.
  7. Customize the Donut Wall with a sign or banner for your particular event.


This donut wall has 20 long pegs that are long enough to hold two donuts each for a total of 40 donuts.


The legs are cut at a 15 degree angle so the donut wall leans back.  The size of this wall is perfect for a table top.


The sign at the top can be customized to fit the event.


This Donut Wall was a big hit at the birthday party and the happy new owners will be using it for more future events.

Sunday, June 28, 2020

Make a Pint Glass Display Rack

In the early 2000's, I traveled sometimes for work.  If a city had a Hard Rock Cafe, I would check it out and pick up a pint glass.  I've collected glasses from 16 cities, so I made a custom display rack. Check out my video of this project below.


I used my X-Carve CNC Woodworking Machine from Inventables to cut out the entire project.
 

I used the Inventables free EASEL online software to design the project.  All of the parts can be cut from two 29" long sections of standard 1x12 boards.  The sign at the top can be customized by simply changing the text.  Click here to open my EASEL project to see how it's designed.


I included dado cuts in the side pieces to accept the three shelves and also holes to make for quick and easy assembly with 8 screws.  I added some hangers on the back and mounted it to the wall with strong drywall anchors.


This display rack holds up to 21 glasses, so I will be able to add to it as I visit other cities with Hard Rock Cafes.  I can look at each glass and remember the story behind it, such as how I got to the Hard Rock Cafe and what the place was like inside.  Thanks for checking out this project!


Clicking a referral/affiliate link in this article and making a purchase will help to support my channel via a small referral fee from the merchant.  Thank you for your support!

Thursday, April 30, 2020

Make a "Now Playing" Rack for Vinyl Records

I had fun hanging out at record stores back in the 1980s.  My favorite local Atlanta store was Turtle's Records & Tapes. They had a "Now Playing" rack on the wall where they would display the album cover of a record while it was playing in the store.  I thought it would be fun to make one that I can use when playing my records.  Check out my video of this project below.


I used my X-Carve CNC Woodworking Machine from Inventables to cut out the entire project, except for two small dowels.


I used the Inventables free EASEL online software to design the project.  The project consists of a backboard with an engraved logo, and a separate "Now Playing" piece cut from 1/2" Baltic birch plywood.   Click here to open my EASEL project to see how it's designed.


I found the Turtle's logo on Google Images.  Luckily, I was able to also find the matching font called Keep On Truckin' that I was able to use to type the "Now Playing" text.  The text at the top is engraved with an 1/8" straight bit at a depth of 0.05".  The X-Carve also drilled matching holes for me, so that I could attach the "Now Playing" cutout using two 2.5" long pieces of 1/4" dowel rod.


This display rack will get a lot of use when I play my vinyl records.  I love the colors and it brings back some great memories of hanging out in the record stores.  Thanks for checking out this project!

Clicking a referral/affiliate link in this article and making a purchase will help to support my channel via a small referral fee from the merchant.  Thank you for your support!

Wednesday, March 11, 2020

Making a Wooden Rush 2112 Album Cover for Makers Rock 2020!

I reproduced the Rush 2112 album cover out of wood for the 2020 Makers Rock Album Art Collaboration on YouTube!  Check out my video and enter my giveaway for a chance to win one.  Don't forget to watch the other participants' videos in this Makers Rock Playlist and enter their giveaways too!


Here is a picture of the wooden Rush 2112 album artwork I created.  I cut out two at one time using a stack cutting technique on the scroll saw.  This was a fun project to make and I can't wait to do another album next year.  If you are interested in the next Makers Rock event, keep an eye on the Makers Rock Website for updates.

Rush 2112 Wooden Album Art


Enter for a chance to win one of my Rush 2112 album artwork pieces in the Rafflecopter widget below (for USA residents ages 18 and older only).  The deadline to enter is March 21, 2020 at 12:00am Pacific time.  A winner will be selected on March 22nd and automatically displayed in the Rafflecopter widget below.  Good luck!

a Rafflecopter giveaway
This giveaway is not associated with Google, Blogger, YouTube, Facebook, Instagram, Twitter or RUSH in any way.
#makersrock