Did you miss me? I'm back! After taking a two-month break for over two years, we've decided to move to bigger house with more land. I will be setting up a shop either in the garage or basement for now so I can start making videos again. After we get settled at the new place, we plan to add a building behind our house that will have more workshop space for me and plenty of gardening space for my wife. Stay tuned!
Friday, March 29, 2024
Tuesday, November 30, 2021
Making Cool Wooden LED Christmas Stockings!
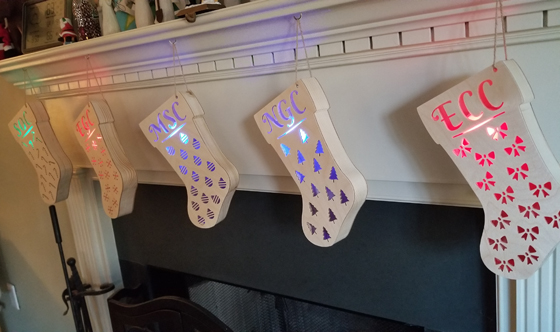
My daughter hung our Christmas stockings on the fireplace mantle and decorated them with some Christmas lights. This inspired me to try to make some wooden stockings that light up. In this video, I make a set of five cool LED stockings with the Inventables X-Carve CNC Machine. Inventables sent me their latest CNC upgrades, so we'll take a quick look what's new for the X-Carve CNC as well.
I used the Inventables EASEL PRO software to design this project. The stocking is basically a box and the front and back pieces are cut from 1/8" Baltic Birch plywood. The side pieces are cut from 2x6 material, then it's glued together to make the box. Click here to open my EASEL project for detailed instructions and to access my drawings.
I found a Set of 5 Battery-Powered LED Puck Lights that fit perfectly inside the stockings. They included batteries and a remote control that controls all five puck lights at once. I simply stuck one light inside each stocking using the included double-sided tape.
These were really fun to make and they look really cool. I love the flashing and fading modes on the remote that make the lights change colors. I hope this gives you some ideas to make some wooden stockings of your own. Thanks for checking out this project! Steve...
Clicking a referral/affiliate link in this article and making a purchase will help to support my channel via a small referral fee from the merchant. Thank you for your support!
Tuesday, August 31, 2021
Making a Kitchen Utensil Organizer
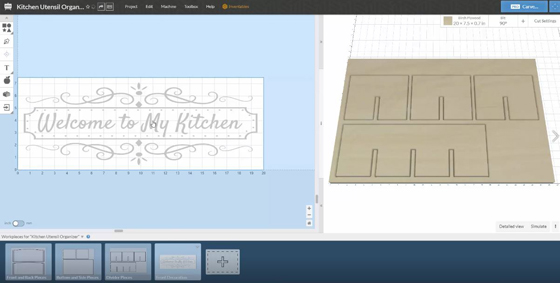
We have A LOT of kitchen utensils and our collection has outgrown the containers that hold them. In this video, I make a HUGE wooden Kitchen Utensil Organizer with the Inventables X-Carve CNC Machine. This project would be easy to make with other tools as well.
I used the Inventables EASEL PRO software to design this project. This would make a great housewarming gift for a new homeowner or for anyone who loves to cook. Click here to open my EASEL design and download the drawings.
This was a fun project to design and make. It solves a problem in our kitchen and those are always the best kind of projects. Thanks for checking out this project! Steve...
Clicking a referral/affiliate link in this article and making a purchase will help to support my channel via a small referral fee from the merchant. Thank you for your support!
Monday, May 31, 2021
Making Four Different Beer Flights
If you've ever been to a craft brew pub, you've probably seen the wooden beer flights that they use to carry tasting glasses or pint glasses to your table so you can taste the different beers. These make great gifts and craft fair items, and you might be able to find a local craft brewery that needs some. In this video, I make four different Beer Flights with the Inventables X-Carve CNC Machine.
I used the Inventables EASEL PRO software to design these. Making beer flights is a perfect example of how you could use a machine like the X-Carve CNC to mass produce projects to fulfill a large order from a craft brewery. Of course you can also make these with other tools - Click here to open my EASEL designs and download the drawings.
If you plan to make a beer flight, I suggest buying the glasses first so you can get accurate measurements for your design. I bought these 5oz Tasting Glasses from Amazon. Below are three beer flights I made for these smaller glasses.
On my fourth design, I created EASEL designs for both the tasting glasses and the full size pint glasses. Here is the beer flight I made for the pint glasses. I like how the pint glasses sit in the holes securely and will not tip over when being carried.
Since these beer flights will be in contact with lots of moisture and condensation, picking a finish that will last will be a challenge. I used spray lacquer for mine which should be ok for periodic home use. If they will be used daily, I would recommend a marine varnish that is used on boats, or an exterior paint would last a while too. No matter what you choose, plan on refinishing or replacing the beer flights at some point in the future.
Thanks for checking out this project! Cheers! Steve...


